Configuring the UIS VPN for Windows Phone 8.1
Before you start, you will need to know:
- your Network Access Token username and password
– create your token on the UIS Network Access Tokens site and keep the window or tab open, in readiness for when you'll need to copy the username and password.
- If you have been advised to use a Managed VPN, rather than the general University VPN service, you will need the VPN server hostname. Available VPNs and their server hostnames are listed on the Managed VPN page.
To set up the VPN, please follow these steps:
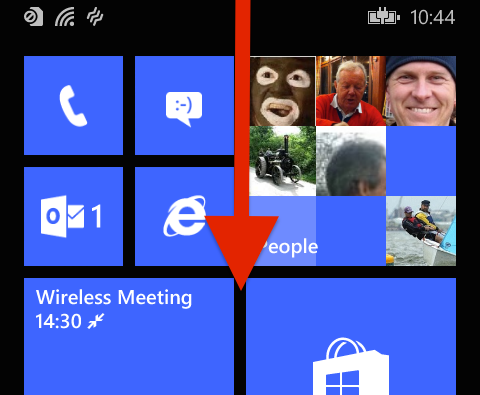
- From any screen, swipe your finger down from the top of the screen:
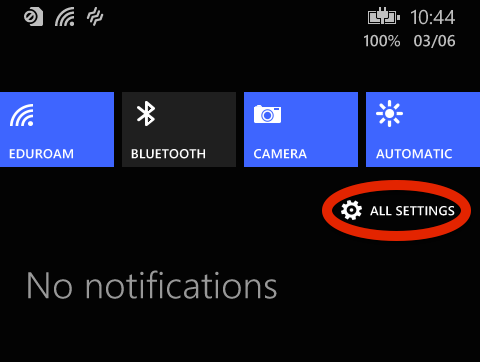
- The notification panel will open. From the panel tap All Settings:
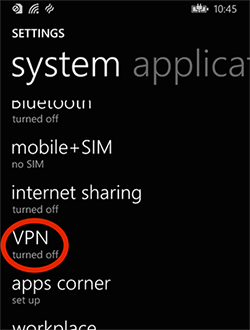
- The Settings menu will open. From the system tab, scroll down and tap VPN:
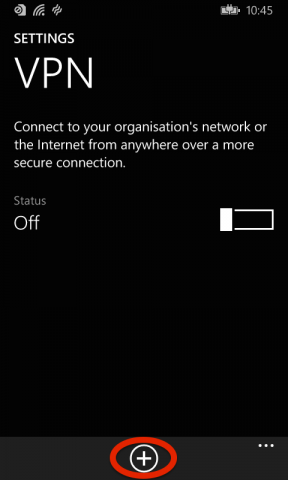
- The VPN settings screen will open. Tap the + button at the bottom of the screen:
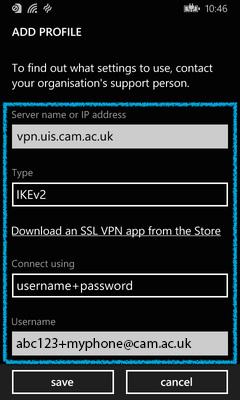
- The VPN add profile screen will open. Complete the settings as shown below and tap save when done:
- Server name or IP address: vpn.uis.cam.ac.uk or, if you are using a Managed VPN, use the VPN server hostname
- Type: IKEv2 (the default)
- Connect using: username+password
- Username: Network Access Token username [CRSid+device@cam.ac.uk] (which you created on the UIS Network Access Tokens site)
- Password: Network Access Token password
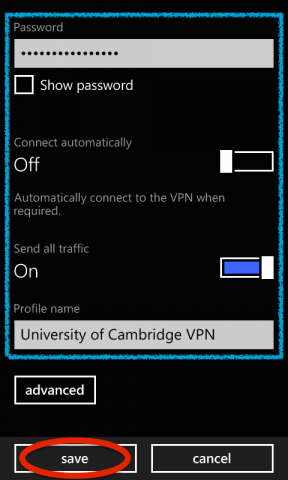
- Show password: (you can tick this if you wish to check the password is entered correctly: it will have no effect on the eventual configuration)
- Connect automatically: Off
- Send all traffic: On (the default)
- Profile name: University of Cambridge VPN
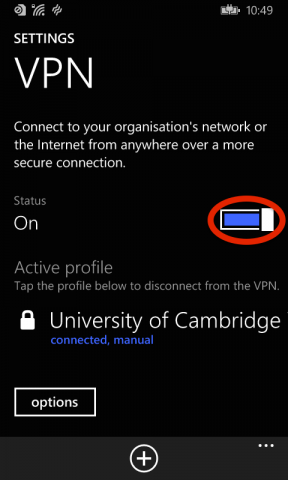
- You will be returned to the VPN configuration screen. Change the Status to On to connect; in the Active profile list below, the University of Cambridge VPN should appear below and show as Connected, manual:
- Press the Windows key underneath the screen to return to the main screen of your phone.
Disconnecting from the VPN
When you are finished with the VPN, return to the VPN settings screen and change the status to Off.
Reconnecting to the VPN
When you wish to reconnect at a later point, return to the VPN settings screen and change the status to On.
If you have multiple VPN profiles configuration (for example, an institutional managed VPN service, in addition to the general University one), you can switch between them by tapping on the different names on the VPN settings screen.