This explains how to create a link to share a document that you can send to other people (inside and outside Cambridge). The process is the same across the Office 365 suite, for both OneDrive and SharePoint for sharing a document, folder, or whole site.
Email address verification
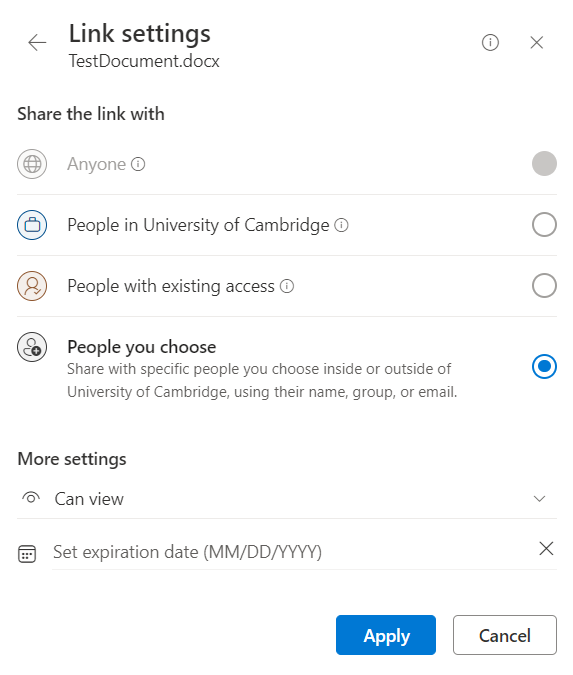
The ability to create and share links with "Anyone" is no longer available in Microsoft 365, SharePoint or OneDrive. You must now create a link to share with specific people by adding their email addresses. This helps improve security.
This process adds them as a 'Guest Contact' in the University Directory so that in the future, you can select their email address from the address book lookup when you want to share another document.
How to create a shared link
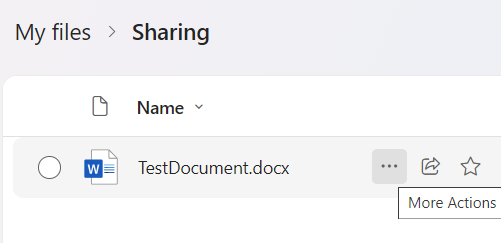
- In Microsoft 365, SharePoint or OneDrive, locate the document you want to share. Select the 'More' icon (the three vertical dots) beside it.
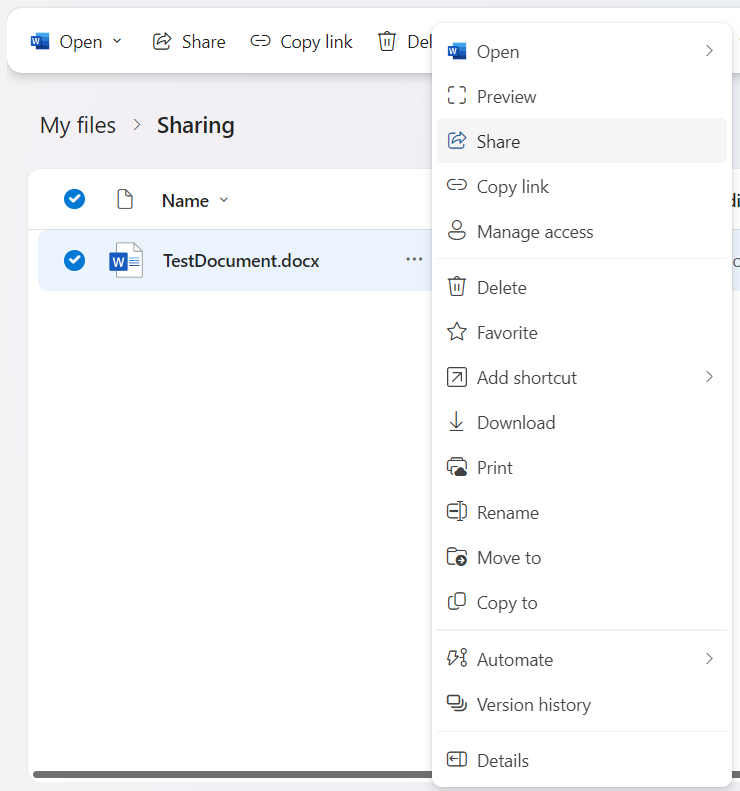
- In the pop-up menu, select 'Share':
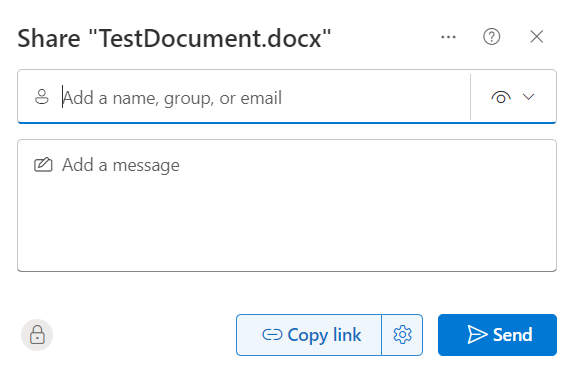
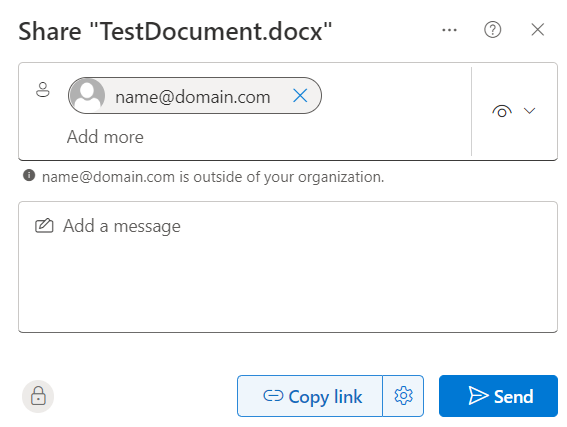
- Select the cog icon next to the 'Copy link' button to open the Link settings menu:
- Select 'People you choose'. Under 'More settings' select the desired level of sharing: Can edit, Can review, Can view, or Can't download. You can also choose to set an expiration date for the share link. Select 'Apply' to save the settings and return to the sharing window.
-
Enter the person's email address. The email address will appear in a dropdown below the text field. Click on this to confirm. The email address should now appear as a grey button including an icon.
You can add as many people as you like, separated by a semi-colon. Add a message to the email if desired then select 'Send'.
Alternatively, you select 'Copy Link' and paste it into your own email message.
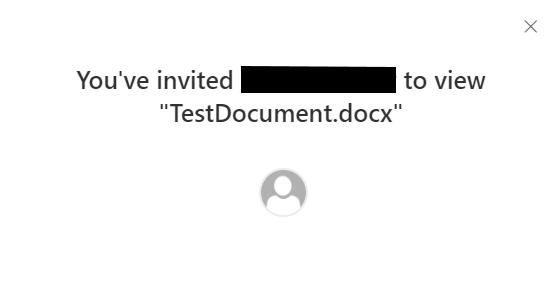
- You'll see a message confirming that the sharing invitation has been sent.
What the recipient sees
First time they receive a sharing link
-
The person you shared the document with will receive an email with a link to the document or file
-
When clicking the link, they get taken to a University sign in screen. They're prompted to enter their email address
-
They will receive a second email with a code they need to enter on the sign in screen. This is only valid for 30 minutes
-
They will see a message asking them to accept permissions
-
They then see a prompt to set up multi-factor authentication (MFA) by downloading the Microsoft Authenticator app.
If they prefer to set up their phone number for text or call verification, they need to select 'I want to set up a different method' at the bottom of this screen. Full instructions for this can be found on our MFA help pages.
Next time they receive a sharing link
-
The person you shared the document with receives an email with a link to the document or file
-
When clicking the link, they get taken to a University sign in screen. They're prompted to enter their email address
-
If their email address isn't connected to an existing Microsoft account, they will get sent an email address with a one-time code. If they have a Microsoft account they don't get asked for this.
-
They are prompted to authenticate with MFA. They'll be asked to verify using their chosen MFA method. This is either using the Microsoft Authenticator app or via text message or call verification.
Get help
Our advisors are available 24 hours a day via live chat for any IT-related queries. You can find the 'Live chat' button at the bottom of the contact us page.