Once you have scheduled a recording you can;
Edit a recording schedule
The scheduled recording information can be changed until the last minute of the session starting.
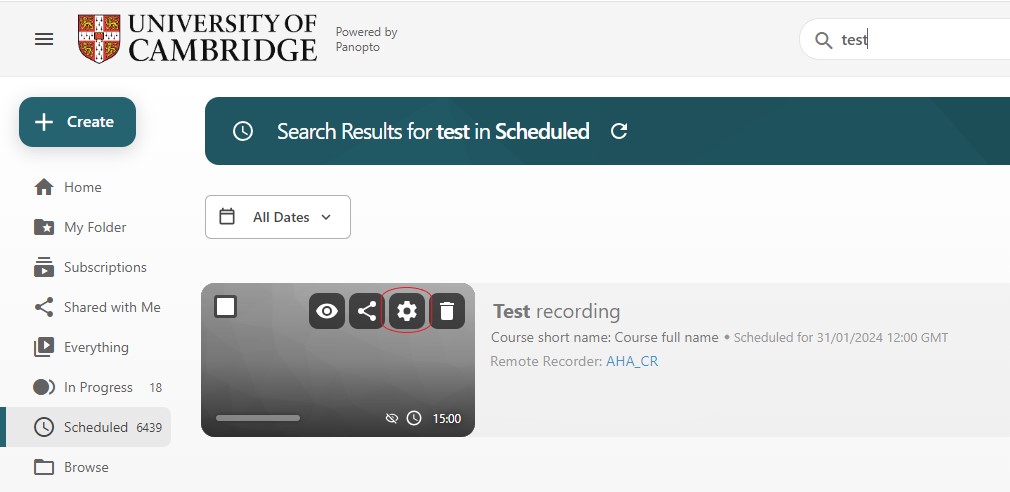
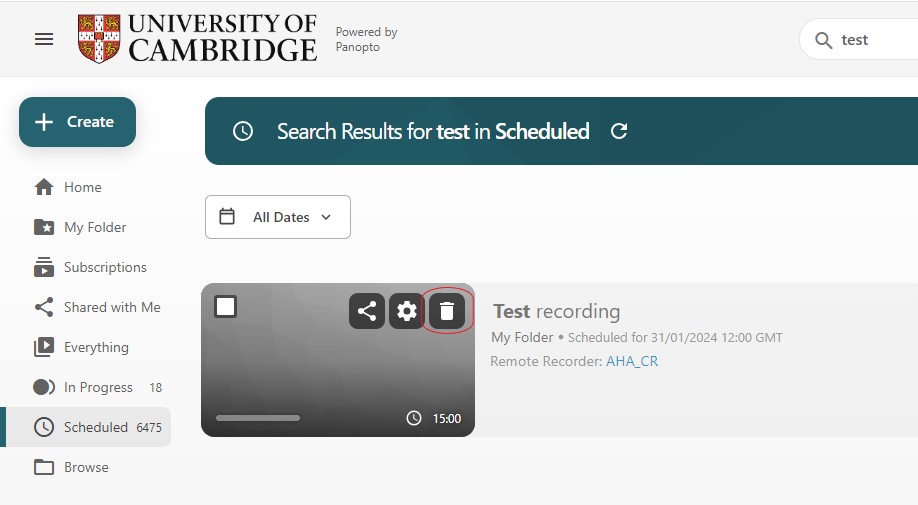
- Select the Scheduled option to view all scheduled recordings.
- Find the recording you would like to amend the scheduling information for and select the Settings cogwheel.
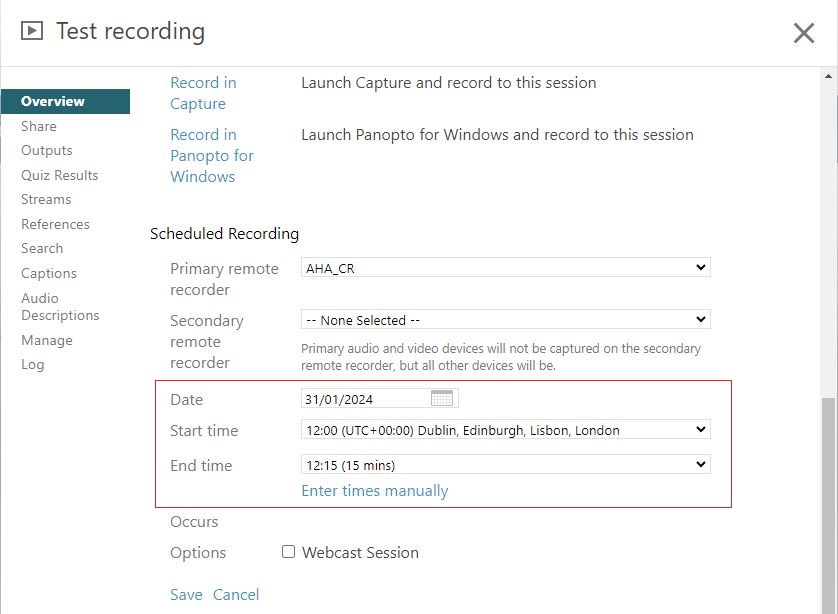
- Go to the Overview page of the recording and select the Edit option.
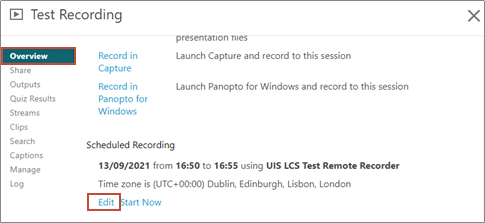
- Enter the new recording date and time, then select the Save option.
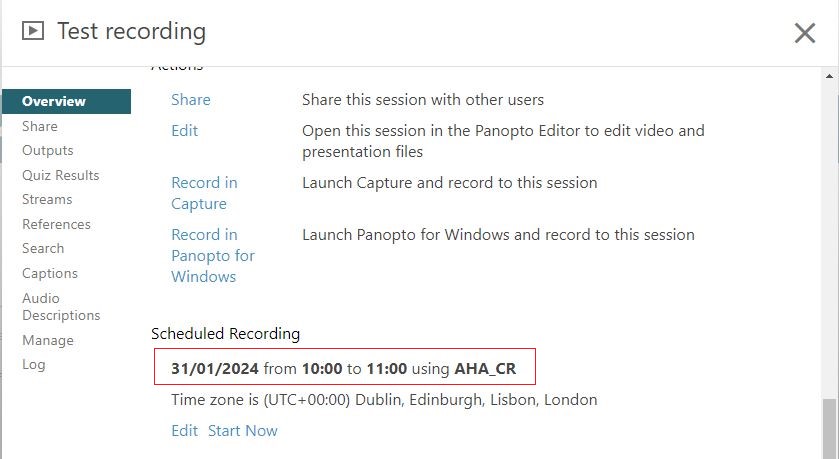
- The new recording date and time will be displayed.

Delete a recording schedule
As a creator you will be able to delete any scheduled recordings.
- Select the Scheduled option to view all scheduled recordings.
- Find the recording schedule you would like to delete. Hover over the recording and select the Delete button.
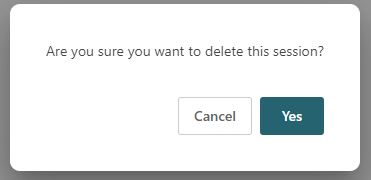
- Select the Yes button to confirm deletion of the recording.
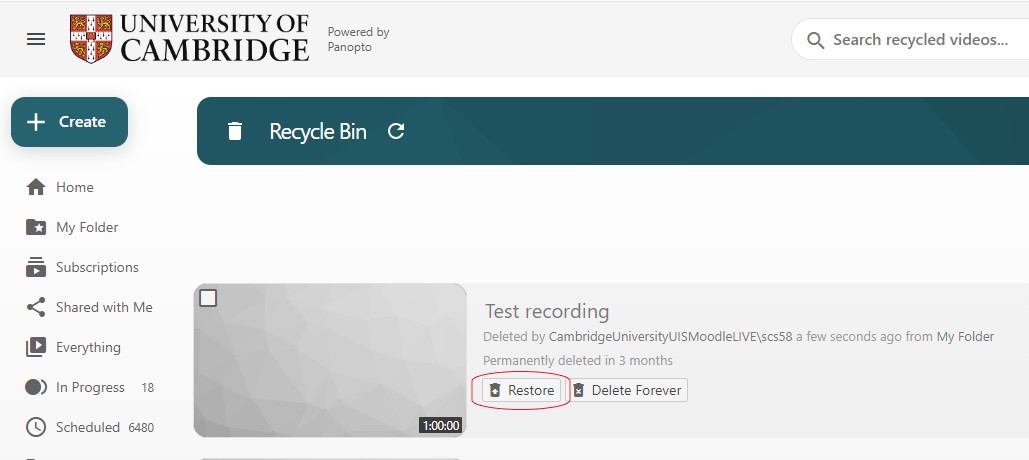
Restore a deleted recording schedule
A recording schedule can be restored if it has been accidently deleted.
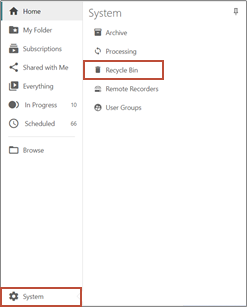
- Select System, then select Recycle Bin
- Locate the recording you would like to restore and select the Restore button.
-
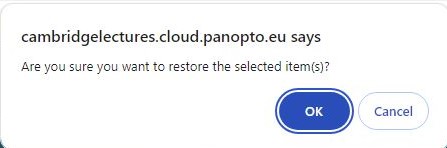
A popup box will appear asking you to confirm that you would like to restore the recording session. Select the OK button if you are sure that you would like to restore this recording. The recording will be restored to the folder that it was originally located in.
Note: Items in the recycle bin will be permanently deleted in 3 months.