New changes will typically be entered by those responsible for them. Although the UIS change process recognises the 3 roles of change owner, change implementor, and change requester, the HEAT form only has 2 fields for names. As the change requester is normally the change owner, in practice these tend to be conflated.
This page covers:
How to create a change
-
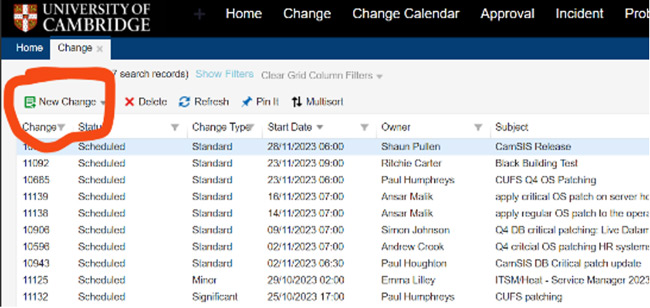
To create a new change, select 'Change' in the top navigation menu to open a list of changes. Select 'New Change' toward the top left. Depending on how your dashboard is configured, the change option might be hidden behind the 'More...' option.
-
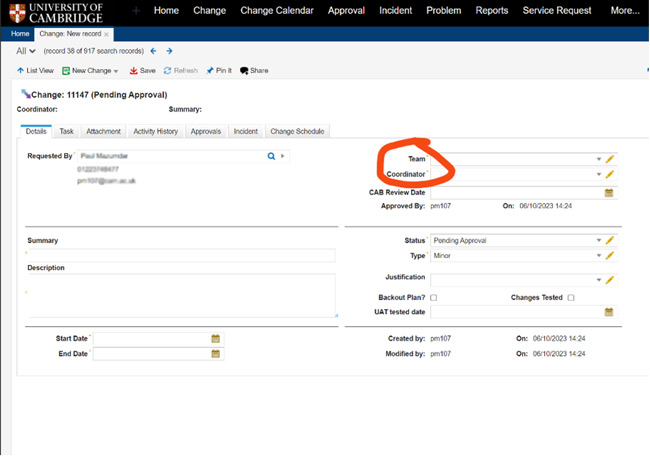
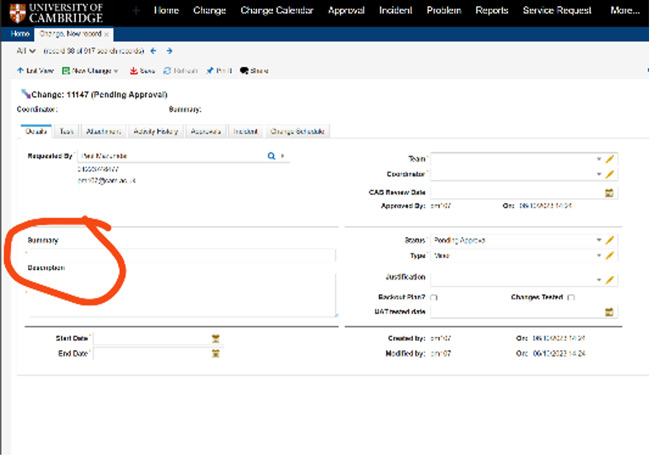
The form that appears will already have the user’s details filled in as the change requestor. To select the change implementer, select their team in the drop-down menu next to Team. This will then populate the drop-down member next to Coordinator with members of that team. Select the change requestor.
-
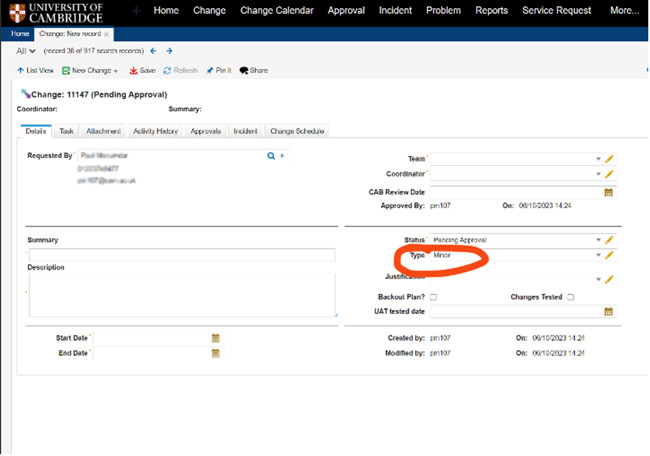
The change type has 4 possible values:
Types of Change
Minor
A change that doesn't affect users or services.
Standard
A change that affects users or services.
Emergency
A change that affects users or services and must be implemented before the next meeting of the Change Advisory Board (CAB). The CAB meets every Thursday at 10am. The change needs to be rapidly assessed by the ECAB.
-
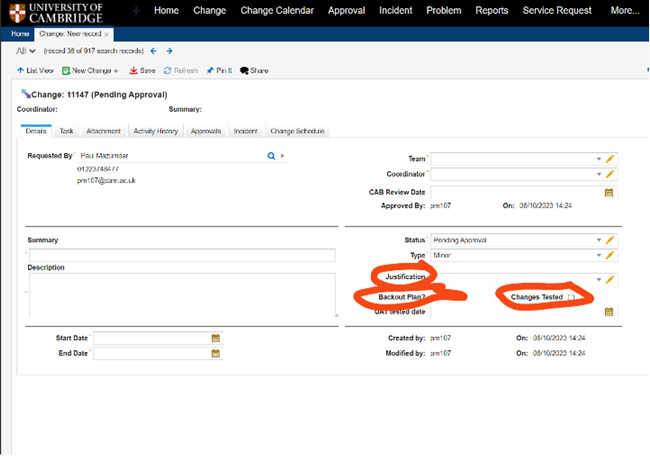
There is a drop-down box next to Justification listing possible reasons for the change. Select the best option. Below this are checkboxes to confirm that there is a plan for backing out of the change if things go wrong and another to confirm that the change has been tested. Neither of these are obligatory to submitting the change but that is because they are not always possible rather than because they should not be carried out.
-
The Summary and Description fields allow you to describe the change to others. Remember that you are describing the change and the actions surrounding it rather than the circumstances leading to the change being necessary. In addition, in the Description you should demonstrate that you have considered any possible impact on the Service Desk and any required intervention from the Comms team.
-
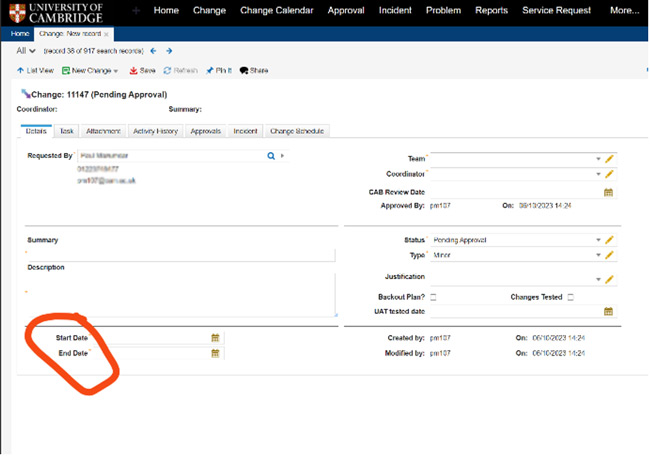
At the bottom of the form, the Start Date and End Date fields should mark the window during which the change should be performed. When select that field, HEAT will pop up a calendar from which you are able to pick the date. The times must be over-typed manually – do not leave them as 00:00 as a zero length Change does not appear on the calendar and this is not trapped as an error by the system.
-
At this point, you can select 'Save' in the left-hand toolbar row and the change record is saved and will be available for a change manager to approve following CAB or ECAB if necessary.

Mark a Change as complete
When a Change is Scheduled, it is possible for the change requestor to amend the status to Implemented (if the Change was successful) or Cancelled (if the change needed to be backed out). After changing the Status, select 'Save' in the left-hand toolbar row.