This page covers how to:
- add an attachment to an incident
- add a note to an incident
- view the email history of an incident
- view the audit history of an incident
- resolve an incident
- mark an incident as spam
Add an attachment to an incident
-
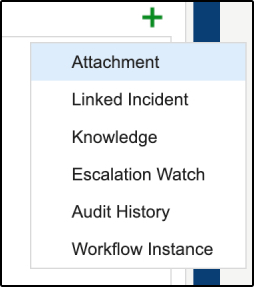
To attach a file to an Incident, you will first need to enable the Attachment tab which is hidden by default. This can be done by selecting the plus sign icon on the right-hand side of the screen next to the vertical navigation scroll bar. From the resulting drop-down menu, select 'Attachment'.
-
The Attachment tab will then appear amongst the other existing tabs.
-
To attach a file, such as a PDF, Word or Excel file, select the 'New attachment' button. A file explorer window will open, allowing you to navigate to the file on your computer and attach it to the Incident.
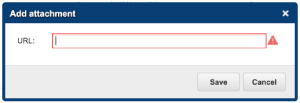
If you want to attach a URL to the Incident, perhaps to a webpage you need to reference to help the user, select the 'New URL' button and enter the URL into the text box.
-
Any attached files or URLs will be listed in the Attachment box below.
-
Once you are finished adding attachments, remember to select 'Save'.


Add a note to an incident
-
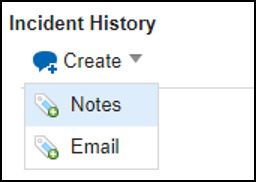
To add a note, scroll down to the Incident History section on the Details tab. Select the drop-down arrow next to the Create button and then select 'Notes' from the drop-down menu.
-
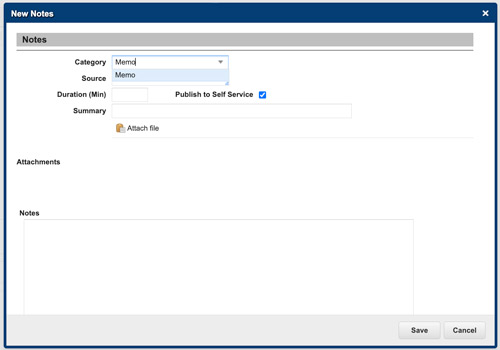
Enter your note into the large Notes text box. Remember to uncheck the 'Publish to Self Service' checkbox if you do not want the note to be visible to the customer.
View the email history of an incident
You can view the history of emails and notes, including any email automatically generated by the HEAT system, by opening the Activity History tab.
You will find a chronological list of all emails and notes attached to this Incident here.
View the audit history of an incident
The Audit History gives you a detailed breakdown of who has done what to an Incident, and when.
The Audit History tab contains a timestamped list of any changes made to the Incident. This includes changes to any audited fields such as Person, Service, Category, Status, Team, Owner and providing the CRSid of the user who made said change. It will also detail attachments being added to the Incident or emails being sent or received.
-
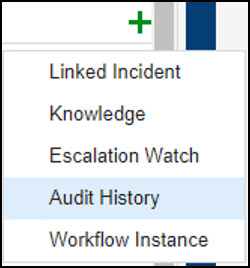
By default, the Audit History tab is not visible, and can be enabled by selecting the plus sign icon and then selecting 'Audit History' from the resulting drop-down menu.
-
The Audit History tab will then appear amongst the other existing tabs.
Resolve an incident
Once you have finished working on an Incident and the User’s problem has been resolved or the request fulfilled, you can Resolve the Incident.
-
Firstly, ensure that the Incident details, such as Service, Category and Owner (the analyst who worked on the Incident) are correctly completed, then open the Resolution tab.
-
a description of the resolution into the Resolution text box and, if required, select a Cause Code from the drop-down menu.
-
The Actual Service and Actual Category fields will have been automatically completed based on the Service and Category fields you have already populated further up the page.
-
If you have resolved the incident at the first point of contact, check the 'First Call Resolution' checkbox to signify this. This information can be useful in management reports.

Mark an incident as spam
If you receive a spam email, to ensure that it does not affect your reporting statistics, you can mark the Incident as spam and it will be removed from your queue and deleted.
To do so, simply open the Incident and select the 'Mark As Spam' button. This is in the top right-hand corner of the screen.
When you view the Incident list (select 'Incident' in the main menu at the top of the screen) it is possible to mark multiple Incidents as spam in one go. This method is not possible if viewing your Incident list on your dashboard.
- You can select multiple Incidents using either the 'Ctrl'+ 'Click' or 'Shift' + 'Click' methods.
- Next, select the drop-down arrow for the Action Menu in the top right corner.
- Scroll down to the System submenu and select 'Mark As Spam (UIS)'.