Scheduled Lecture Capture can take place in centrally managed teaching spaces, arranged through the Student Registry Room Booking team, or in departmentally managed teaching spaces.
View the list of rooms where Scheduled Lecture Capture.
To schedule a recording in departmentally managed teaching spaces;
- you must be enrolled on the relevant Moodle course(s) as a 'Creator'
- the Panopto block should be added to the course and the course must be provisioned with Panopto
- you need to be added to the remote recorder group
Schedule a recording
Publish a recording
Staff that have the ability to schedule sessions will receive a notification if there is a problem preventing a recording from starting in one of the rooms they are assigned with a scheduling role. See Notifications of an issue affecting a recording.
Schedule a recording
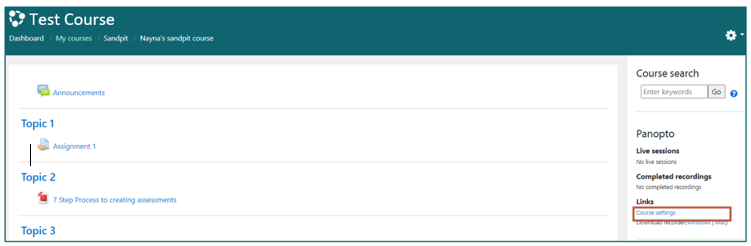
- To log into Panopto go to the course in Moodle. In the Panopto block, select Course settings.
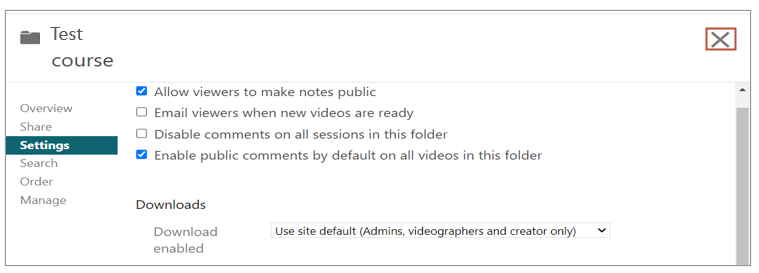
- The Panopto folder will open in a new tab. Select the X icon to close the folder settings pop up window.
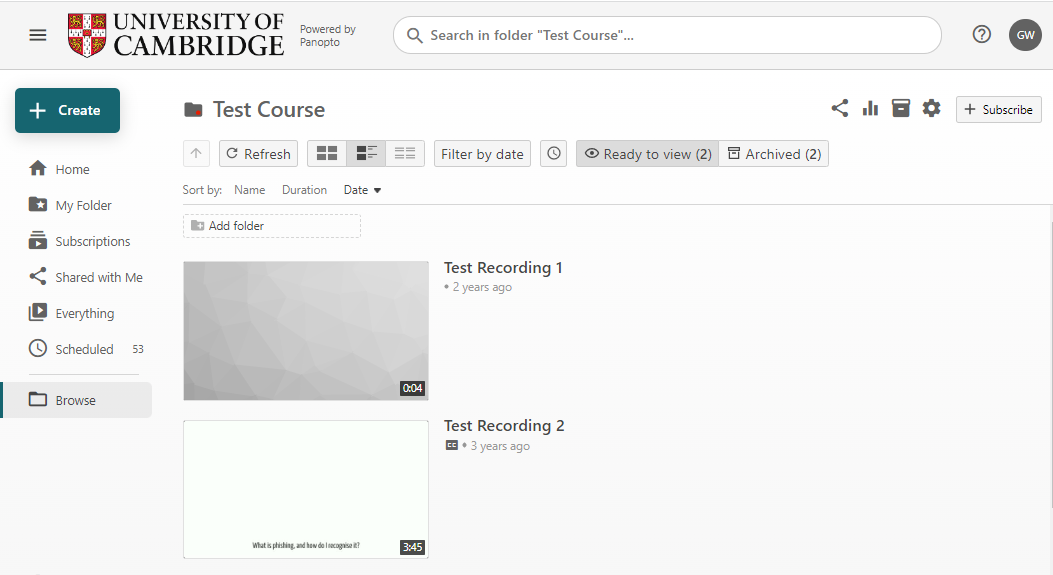
- You will see the Panopto course folder.
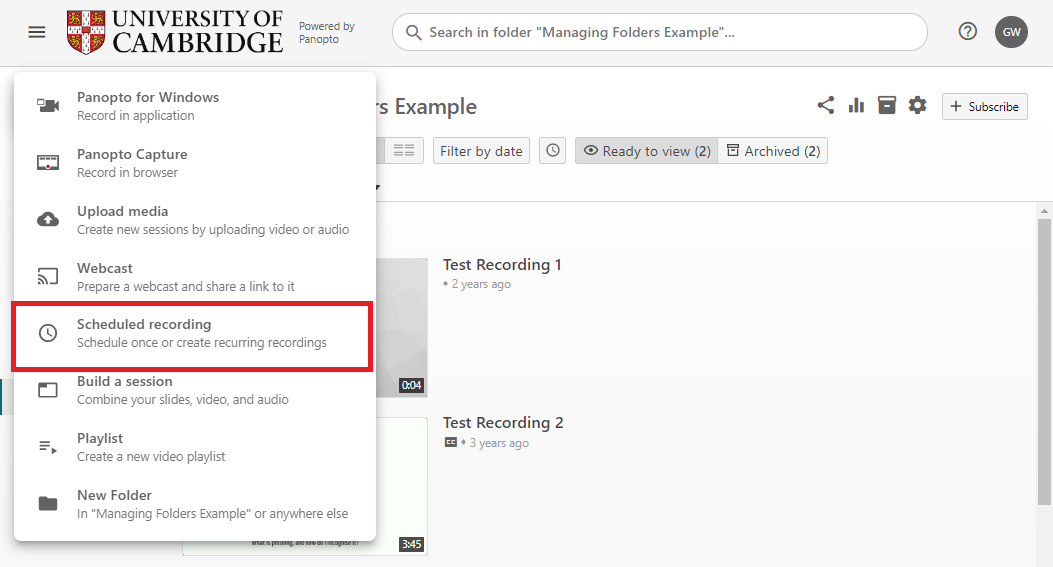
- Select the Create button and select Scheduled recording from the list.
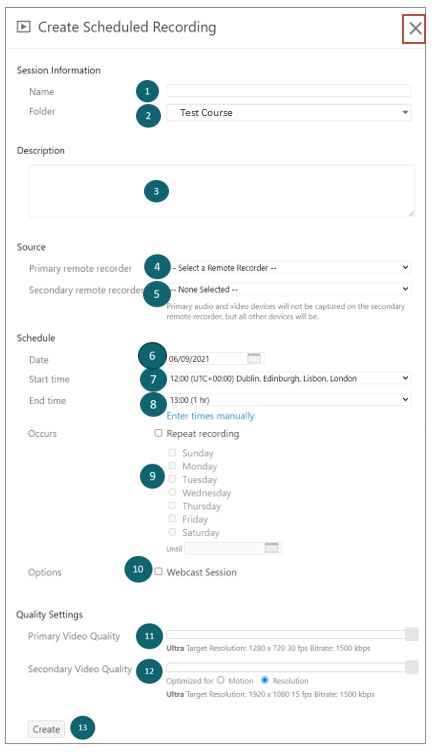
- Complete the appropriate fields in the window. See table below for more information.
Number Description 1 Enter a name for your recording. This name will be displayed to students 2 This will be prepopulated with the Moodle course name if you have logged into Panopto through Moodle.
If this needs to be changed, type the course name to search for a different folder. Panopto will filter the folders and the one that you are looking for should appear in the list to select.
Quick access lists the folders you have recently accessed. All folders, list all folders available to you in Panopto.
3 A description of the recording is optional. When the recording is viewed, this description can be seen on the details tab of the recording. 4 Select the remote recorder of the room you would like to schedule this recording for. The remote recorders are generally named according to the following naming convention: ‘DEPT’ ‘ROOM NAME’ 5 Do not specify a recorder here. The default setting of None Selected should be applied, secondary recorders are not used.
6 Use the calendar or manually enter the date of the scheduled recording 7 Select the Start time of the recording from the drop-down list. The timings are listed in 15-minute intervals.
If you wish to add non-standard recording times (eg 5 past the hour – 5 to the hour) click on the Enter times manually option located below the End Time.
The UTC time zone adjusts to the time zone (GMT/BST) the PC is set to. As long as the time specified reflects the time the event will happen on the day the time will be automatically adjusted to the time zone.
8 Select the End time of the recording from the drop-down list. The timings are listed in 15-minute intervals.
If you would like to change the End time after the scheduled recording has begun, then you can do this by going back to this setting and changing the End time.
9 If the scheduling needs to be repeated on a weekly basis, click on the Repeat recording checkbox and select the appropriate days. This will create multiple occurrences of the recording which you will be able to differentiate by the date that will be added to the title of the recordings.
Use the calendar or manually enter the date of when the repeat scheduled recordings should end.
10 If the recording is to be a scheduled webcast (live stream), then select this checkbox.
This will provide a live webcast link in the Panopto block of the Moodle course which the students can select to watch the live session. The link to the live webcast can also be sent out to students via Moodle announcements, email or using other methods of communication.
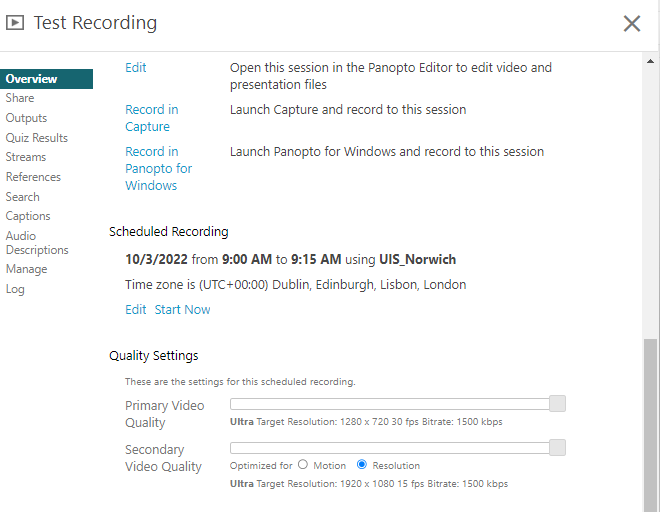
11 This is set at the optimum quality. Leave this setting as default unless you want to reduce the quality of the Primary video. 12 Leave this setting as default unless you want to reduce the quality of the Secondary video. 13 Select the Create button once you have completed the setup up of the scheduled recording. - Once the Create button is selected, you will see the following screen indicating your scheduled recording has been setup.
Publish a recording
Once the recording has been scheduled it will inherit the settings of the folder it is stored in. The default availability setting is 'immediately'. This makes the recording available in the Moodle course as soon as it's processed. This setting can be adjusted at a folder level or an individual recording level. It is recommended to keep the default availability as 'immediately' or to set it to 'never' at folder level and change it at an individual level when ready.
Note: Only recordings in the top-level folder will display on the Panopto block of the Moodle course. The list of recordings will not include any recordings that are available within Panopto sub folders.
Publishing settings available at folder level
If the folder level setting is chosen, then these publishing settings will apply to all the recordings in the folder. Creators can change folder settings in the folder.
Recordings are most likely to be published in a few minutes but will be dependent on bandwidth, internet connections and times of day - its best to give Panopto up to 24 hours turnaround.
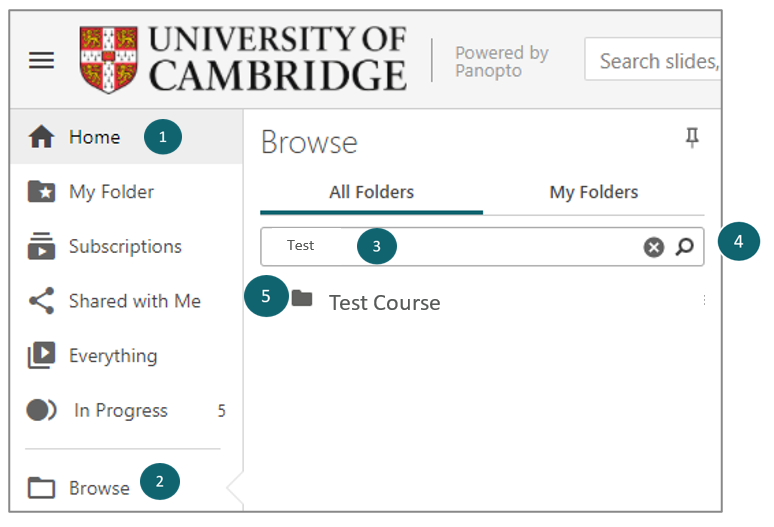
- Locate the Panopto course folder the recording is to be uploaded to. The Panopto course folder name will consist of the Moodle course name.Note: If you need the recording to go into a sub-folder, you will need to select the sub-folder from the dropdown list of folders.
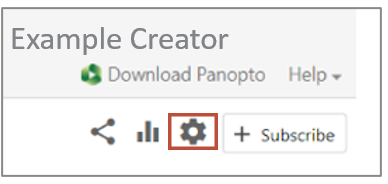
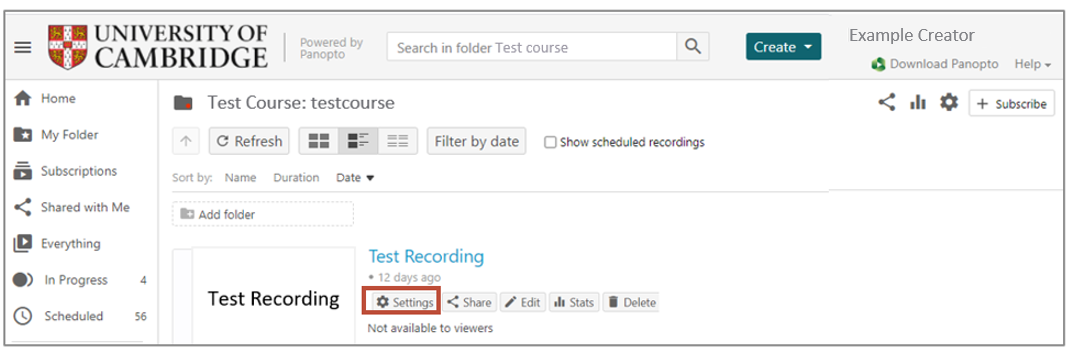
Number Description 1 Select the Home option 2 Select the Browse option 3 Enter a Search term to find the folder with your recording 4 Select the Search icon 5 Select the Folder - Select the settings cog icon on the top right of the screen.
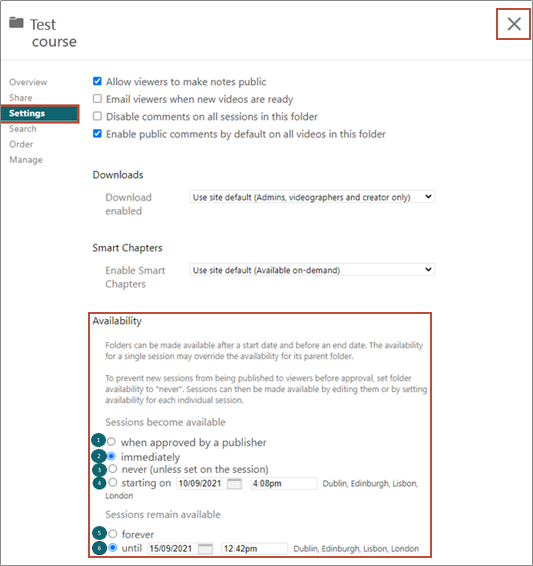
- This will display the Overview settings for the folder. Select on the Settings option. Select the appropriate Availability settings for the folder. The default option is 'immediately'. There are two additional options (when approved by a publisher and never) which are available at the folder level but are not available at individual recording level. Select the X to save the settings
| Number | Description |
| 1 |
This will mean that anyone with a publisher role for the Panopto folder in which the recording is stored will be able to approve the recordings created in this folder. Further guidance on approving a recording. Note: Once you select this setting, any existing videos in this folder will need approval before they can be viewed. The current setting will be overridden |
| 2 | The recording will be available to view as soon as it has been recorded and processed. |
| 3 |
The session will remain unavailable until a creator is ready to publish the recording at which time, they simply change the availability on the session. This is the recommended folder setting to use if you are not using the ‘immediately’ setting |
| 4 |
The recording will be available from the date and time specified. Use the calendar and time dropdown list or manually enter the date and time. This is most effective on sessions where the folder is set to ‘never’ and individual sessions given a date/time. For example, 24 hours or 48 hours after recording giving the lecturer opportunity to check the session |
| 5 | The recording will be available to authorised viewers indefinitely as per the Panopto retention policy. |
| 6 | Use the calendar and time dropdown list or manually enter the date and time. |
Publishing settings available at the individual recording level
- Go to the Panopto folder where your recording is stored and select the Settings button.
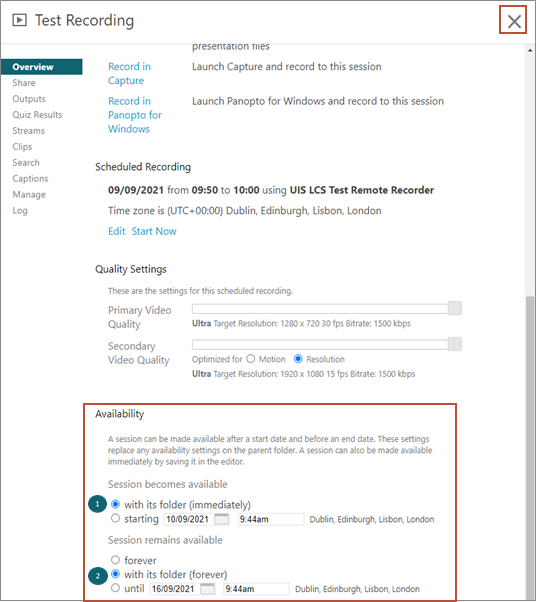
- Select the Overview option, to view/change the default publishing Availability settings for a recording (inherited from the parent folder). Two publishing options (when approved by a publisher and never) are not available at folder level. Once updated, select the X to save the settings.
Number Description 1 The recording will be available to view as soon as it has been recorded and processed. 2 The recording will be available to authorised viewers as long as it is stored in the Panopto folder.
Approve a recording
If the publishing setting has been set to 'when approved by a publisher', then a publishing workflow will need to be followed to approve and publish the recording to viewers.
Note: Care should be taken when changing a folder to use the approval workflow as emails will be sent to all Publishers (usually the Moodle roles of Coordinator, Teacher or Non-editing teacher) or, potentially Panopto Administrators, resulting in large amounts of spam.
It is important that at least one Publisher is assigned to the Panopto folder if using 'when approved by a publisher' setting or any requests for approval will be sent to the Panopto Administrators.
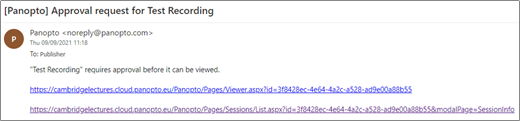
- Each time a recording is created in a folder with this setting, an email notification to approve the recording will be sent to anyone with a Publisher role for the folder. There can be multiple publishers assigned to a folder but only one publisher needs to approve/reject the email request
Email links:
1st link: Select to view/edit the recording
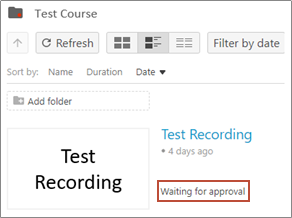
2nd link: Select to access the publishing approval settings. You can also directly access these settings from within PanoptoThe recording will be displayed in Panopto with a status of Waiting for approval
Creators can approve their own content if they also have the Publisher role assigned.
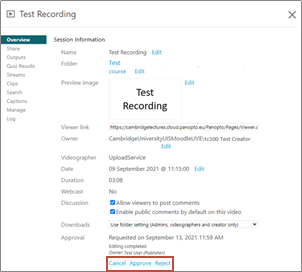
- There are 3 publishing options available;
Cancel - to refuse access to view the recording, no need to provide a reason why
Approve - to allow viewing of the recording
Reject - to refuse access to view the recording and provide a reason whyThe creator who added the recording to the folder will receive an email confirming that the recording has been approved for viewing
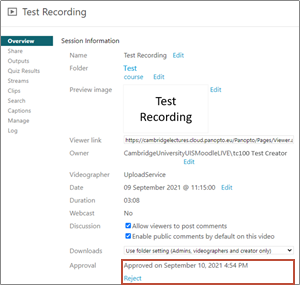
- If the Approve option is selected, confirmation of the date and time of approval will be shown.
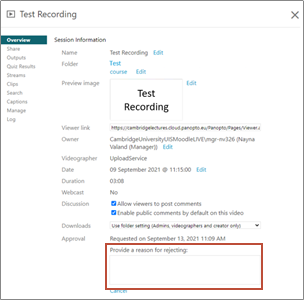
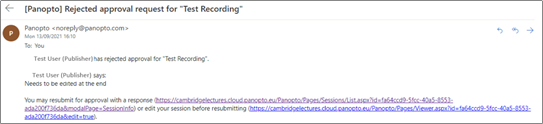
- If the Reject option is selected, enter a reason for rejecting the request and select OK.
Reasons for rejecting the recording could be that it still needs to be edited. The creator of the recording will receive an email notifying them of the reason for rejection. They can then go ahead and make changes to the recording.The requestor will receive an email confirming that the approval has been rejected and the reason why.
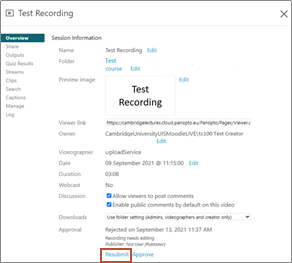
The requestor can then make updates and the recording can be resubmitted for approval to the publisher. This can be done by the creator of the recording by selecting the Resubmit link and entering a reason for the resubmission.
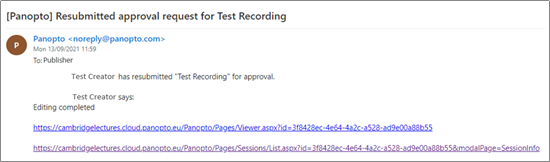
The Publishers will then receive an email to approve the recording.
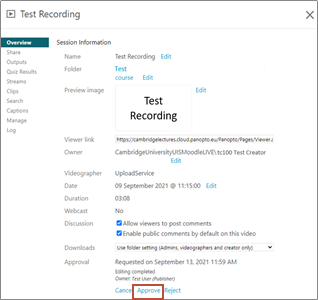
The publisher can then go ahead and approve the request.
Once approved, the Waiting for Approval recording status will clear and the recording will be available to view.
- If the Cancel option is selected, the approval request will be Cancelled.
The requestor will then receive an email confirming the cancellation of the request.

Notifications of an issue affecting a recording
Staff that have the ability to schedule sessions will receive a notification if there is a problem preventing a recording from starting in one of the rooms they are assigned with a scheduling role.
For centrally managed teaching spaces, the Student Registry room booking team will receive a notification and will log the call with the Lecture Capture Support team to investigate further if it is not clear what the issue is.
For departmentally managed teaching spaces, local lecture capture support staff should carry out initial checks to ensure the equipment is functioning as expected before passing on to Lecture Capture Support.
| Message | Meaning |
| [Panopto] Remote recorder primary device disconnected: name of remote recorder | Primary audio or video device not connected (if primary audio is disconnected the recording will fail) |
| [Panopto] Urgent: Scheduled Recording "name of session” is Past Due. | Message received if a scheduled recording did not take place at the time due to begin |
| [Panopto] Warning: Scheduled Recording "name of session” is at risk. | Message received if a scheduled recording is due to take place but there is either a primary device disconnected or the Remote Recorder is offline |
| [Panopto] Remote recorder inaccessible: name of remote recorder | Remote Recorder is disconnected |
If one of the above notifications is received, departmental staff should take the following steps;
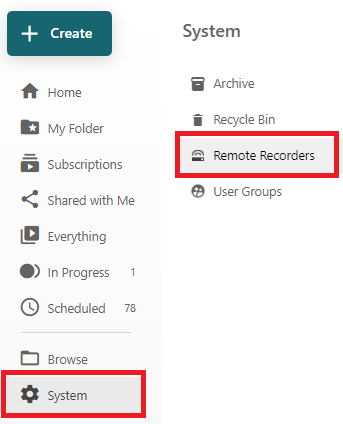
- Login to Panopto and select system > Remote Recorders
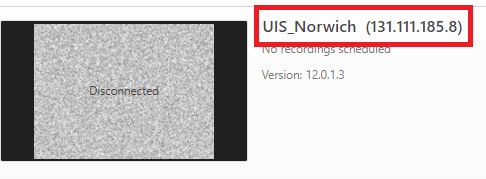
- If the Remote Recorder indicates it is disconnected, the equipment in the room may require powering on.
- Click on the title of the recorder for the room
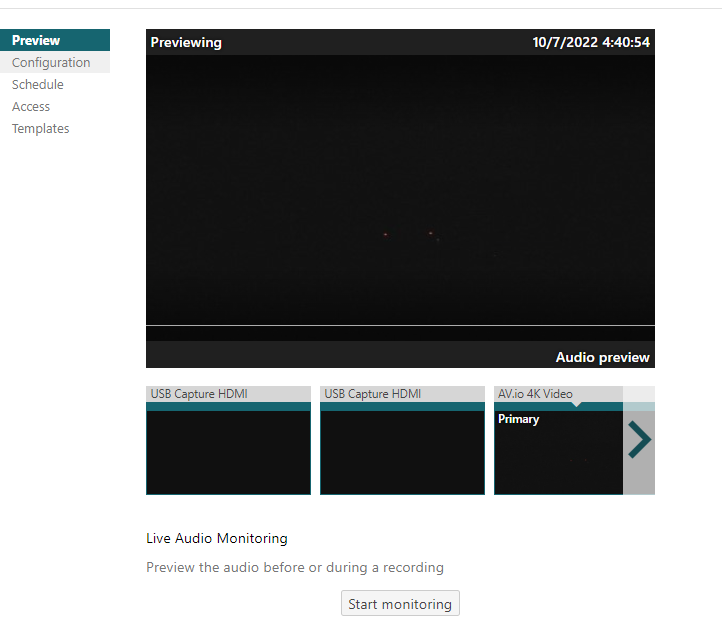
- Check if there are any notices (in red) on the preview screen to indicate a device is disconnected.
- If any devices are indicating they are disconnected, they will need to be switched on.
- If everything looks ok, it may be that the issue has been resolved since the notification was sent
- If it is not possible to resolve the issue it should be reported to lecturecapturehelp@uis.admin.cam