Live Events and Webinars are types of meeting that can be created in Teams that allow for more control over the administration and participation. Webinars allow for 2-way communication between presenters and attendees, whereas interaction in Live Events is restricted to a managed, written question and answer format.
There are restrictions to who can create these particular meeting types:
- For Webinars, you must have an Exchange Online mailbox in order to view the Teams Calendar and create Webinars. You must also have an A3 or A5 Office 365 licence. Visitors or those in institutions with their own Microsoft tenancy may only have an A1 Office 365 licence. You can check which licence type is assigned to your account via the Office365 portal.
- For Live Events, you must have an Exchange Online mailbox and an A3 or A5 Office 365 licence. You must also be in the permissions group to use the Live Events Portal and access the University Live Events Calendar.
Creating a Live Event
Request access to the Microsoft Live Events portal
Complete the form via the self-service request portal (you only have to do this once). The UIS Service Desk team will assign you the necessary permissions to use the Microsoft Live Events portal and the shared Calendar. You will get confirmation once this has been done. It can take 24-48 hours for the change to take effect in the system before you will have access to create Live Events in Teams.
Use the UoC Live Event Scheduling Calendar to help plan and manage bookings
The University can only run 15 simultaneous Live Events at any one time, so to help avoid clashes we ask that all scheduled Live Events are added to the UoC Live Event Scheduling Calendar. If the quota for simultaneous Live Events should be exceeded, those that are booked in the UoC Live Events Scheduling Calendar will be given priority. To add the calendar to webmail follow these steps:
-
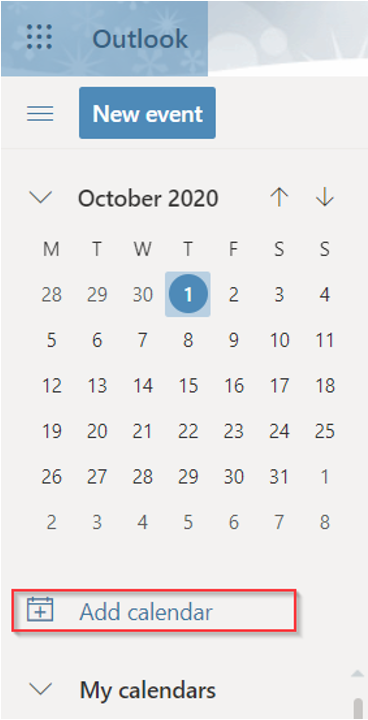
Select the calendar option in the Outlook Web App
-
Select 'Add Calendar'
-
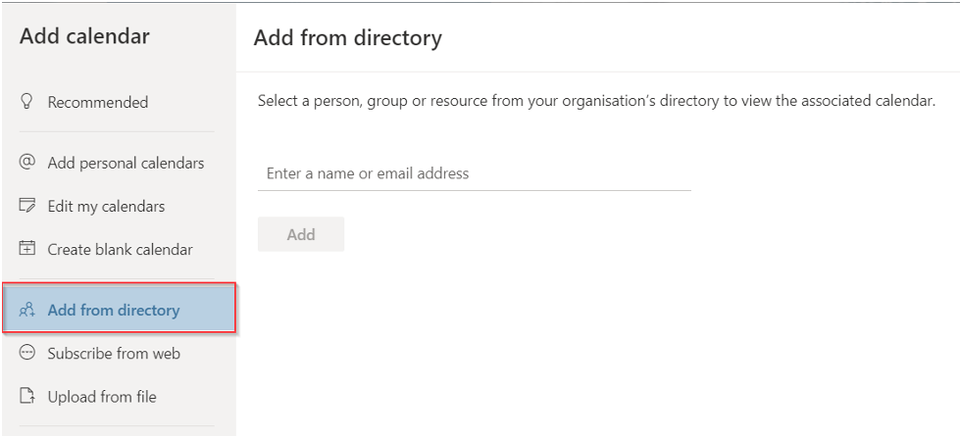
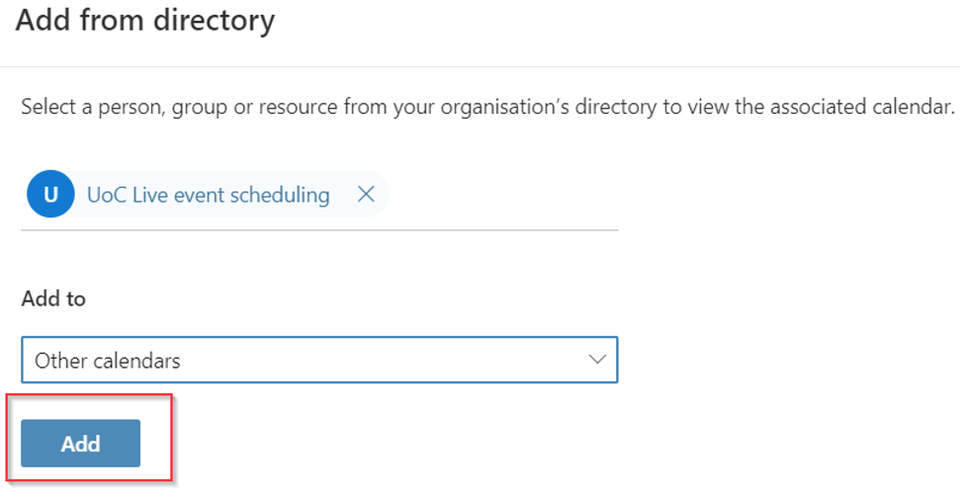
Select 'Add from directory'
-
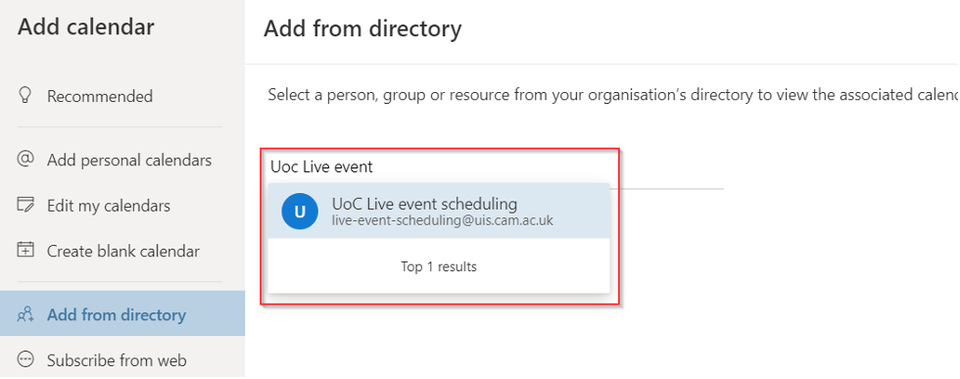
Type 'UoC Live Event Scheduling' into the search field and click on the calendar that appears in the results drop-down
-
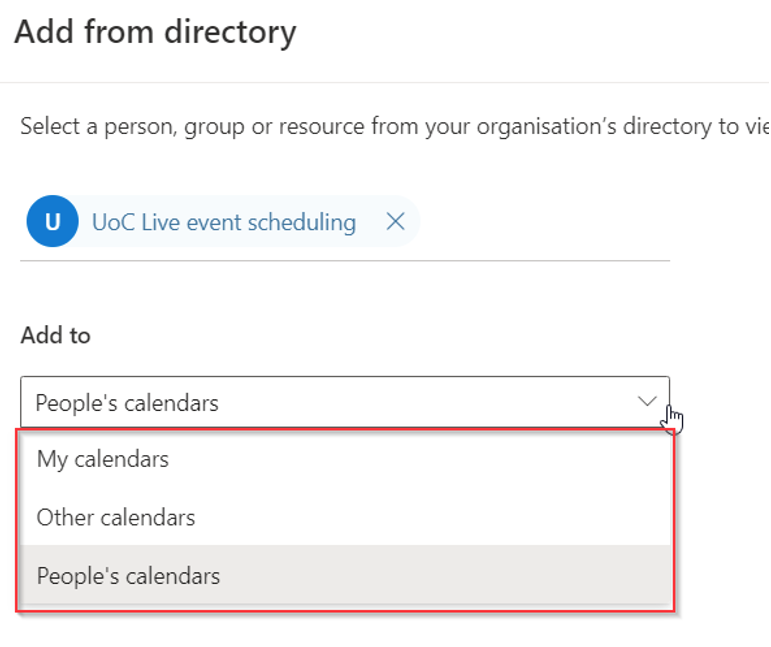
Select a calendar category from the menu supplied by the drop-down menu to choose where it will display in your list of calendars
-
Select the 'Add' button
-
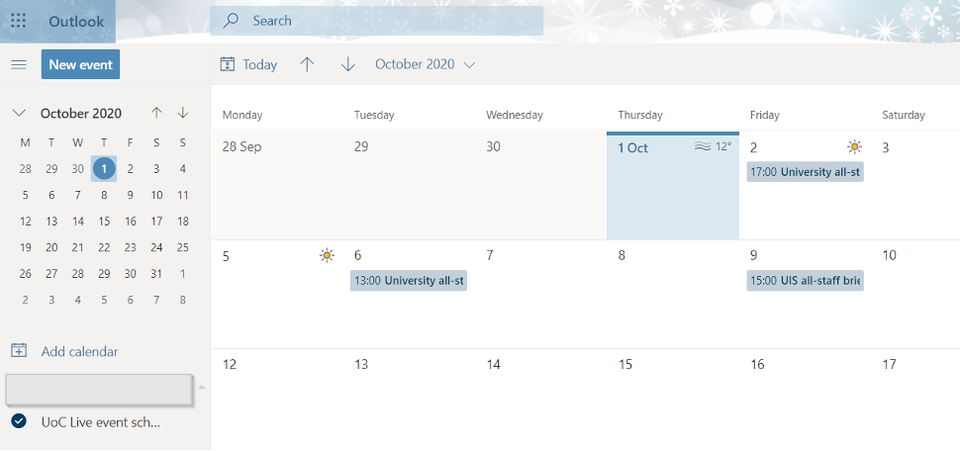
You will see a notification on screen to say the calendar has been added and the calendar can now be found under the calendar group you selected
Creating a Webinar
You can find out how to create a Webinar on Microsoft's support website.
External Presenters can be sent a unique link that allows them to bypass the lobby, find out how to add them on Microsoft's support website. Note that they must be using Teams for the web or the Teams Desktop app, the join link does not work with Teams Mobile.

