This guide is aimed at new users of University-managed Windows laptops. These are known as University Managed Desktop (UMD) devices.
There are some simple steps to help you get set up as quickly as possible.
Before you start
If you're new to the University, you must collect your University IT account before setting up your new laptop.
If you work in the Research Office, your laptop must be attached to the network with a cable for the set-up process.
Initial setup
-
Unpack your device and switch it on. The device will then start setting up.
-
If prompted to connect to a network, use a docking station if available. Or select a University network such as UniofCam-Guest. You cannot connect to the eduroam wifi network for set up. If you're starting remotely, use your home wifi.
-
The machine will start running through some setup steps and install software. This usually takes up to 30 minutes to complete, depending on your internet connection speed.
-
When you see the sign in screen, enter your CRSid or @cam.ac.uk email address and University account password (formerly Raven).
-
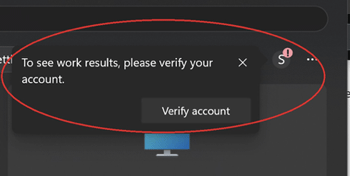
You must verify your account to enable you to sign in to Microsoft 365 apps including Teams and Outlook.
Select the search bar at the bottom of the screen. You will see a message asking you to “verify your account” in the top-right corner of the screen. This will enable you to sign in to Microsoft 365 apps including Teams and Outlook.
Select 'Verify account'. You will be prompted to verify your account, either through text, call or through the authenticator app.
-
Go to the Start Menu or search bar and search for “Company Portal”. This may take up to 5 minutes to appear.
Open the Company Portal app. This is where you go to download software and applications.
Choose your institution from the dropdown menu. This is not in alphabetical order so you may need scroll. If you do not see your institution listed, contact the Service Desk.
If you cannot see a list, go to Microsoft Intune Web Company Portal to classify your device. Sign in with your @cam email address, for example, abc123@cam.ac.uk. Select your device, then select “Device Category”.
You can now download any software available in the Company Portal (some may require a licence or sign in).
-
If you’re transferring to another division within professional services
You must change your University account password after logging in to your device if you’re transferring to another team with professional services. This updates your access to shared drives and other resources. Before you do this, make sure you're connected to the network using a cable or docking station. Go to the password management app, and log in to change your password. Log out of your new UMD device and wait 30 minutes before logging back in with your new password.

After initial setup
Getting familiar with Windows 11
Get to know your way around Windows 11 on the Microsoft support site. Find out about the updated design, improve search function and new productivity tools.
Windows 11 training is also available for staff.
Connecting to wifi
Set up devices to connect to eduroam wifi network. Automatically stay connected across most University buildings and some open spaces in Cambridge.
Setting up Outlook
Open Outlook the app by selecting the Start button on your Windows device. You should see Outlook in the list of apps
You can add a shared mailbox if you need access to one.
You will also need to create a new email signature. You can use the University standard email signature template if needed.
Setting up Teams
Open Teams by selecting the Start button on your Windows device. You should see Teams in the list of apps.
Accessing your files and folders
Important: do not save your files to your local C drive. Make sure you save your files to your University OneDrive account so you can access on any device. You will need to log into OneDrive with your @cam.ac.uk email address and University account password to do this.
OneDrive
You will have the OneDrive app on your UMD device. Access it by selecting the cloud icon from the Task bar (the ribbon at the bottom of the screen). Or by searching for “OneDrive" in the search bar.
Z drive
The Z drive is your shared drive. You will find other shared drives such as the R and J within the Z drive. You will need to check with your new team or your local IT team if you should have access to this.
To access the Z Drive you’ll either need to be attached to the Cambridge University Data Network (CUDN) via an ethernet cable or docking station. Or you can use the University VPN (instructions on how to set this up are further down this page).
You will also need to add your Windows credentials before you can access your Z Drive.
- ‘Credential Manager’ -> ‘Windows Credentials’ -> ‘Add a Windows credential’
- Internet or work address: ‘blue.cam.ac.uk’
- Username: Your CRSid
- Password: Your Raven password.
You can pin folders that you use regularly to your quick access folder so you can access them directly without going through the Z:Drive. If you right-click on the folder you want to add to quick access, and then select ‘Pin to Quick Access’.
SharePoint
You may also have a SharePoint team site for storing shared documents that you can collaborate on with your team.
Find out more about SharePoint
Printing
To print from a Window device to a University-managed printer you will need to have Print Deploy installed, and be on the University network, or connected to the VPN.
Installing software
Open the "Company Portal" app. You can choose from 150 software apps to download. Find out more about installing software using the Company Portal.
If you need Adobe Acrobat Professional software your manager will need to buy a licence first. You can then complete the general software request form and upload the purchase order. After this, you will see the software available for download.
If you need any other software that isn't in the Company Portal, please use the UMD software request form.
If you need to install or run applications with administrative rights, you must apply for elevated permissions.
Setting up your laptop for remote working
You can access most of the University's systems and online resources using your University account (formerly Raven). You may need to use a VPN to access certain University resources when away from the University network. For example, the Cambridge Human Resources Information System (CHRIS) or the Drupal content management system (CMS).
There is a general-purpose University VPN but some specific departmental resources may need you to use a Managed VPN. Check with your colleagues if you're unsure which VPN you should use.
Finish setting up your IT
Review our checklist IT set-up tasks if you’ve just joined the University.
Get help
Our advisors are available 24 hours a day via live chat for any IT-related queries. You can find the 'Live chat' button at the bottom of the contact us page.