View a group on Toolkit
The Group view shows a list of groups and distribution lists at the selected institution.
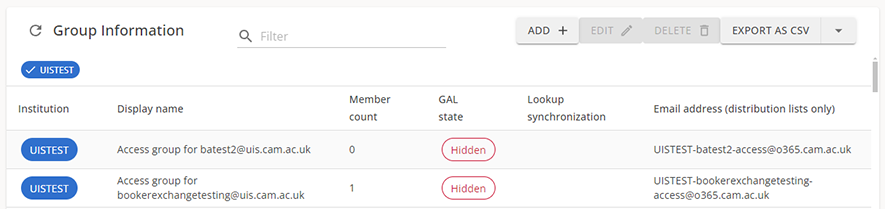
The list shows:
- the institution
- display name
- membership count
- if the group is hidden in the Global Address List
- if the group is synchronised with a Lookup group and the last sync status message
- the email address for distribution lists
Select a column heading to sort the list by that column.
The ‘Lookup synchronization’ column will:
- be blank if the group is not being synchronized with Lookup
- have an upload arrow if the group is being synchronized to Lookup
- have a download arrow if the group is being synchronized from Lookup
- provide a brief description of the last sync status alongside the arrow
To the top right of the screen you’ll find a Select, Create, Delete, Edit and Export button.
To Export the currently displayed list, use the arrow button next to the Export option to export the file as a CSV or Excel file.
To view additional group details, double-select a row in the table. Additional group details will display in a drawer on the right-hand side. If you have permission, these details are editable.
Create a group or distribution list
To create a group:
- select the institution you wish to create a group for using the chips in the top left of the screen. The ‘add’ button is disabled until only one institution is selected.
- select ‘add’ to open a drawer to the right of the page
- enter a ‘Display name’ field. This is the only required field and must be unique across Blue AD.
- select ‘Create group’ to confirm. The group will be created using a GUID as the underlying AD object name (to ensure uniqueness).
If you wish to synchronize the membership of the group with a Lookup group, choose a sync type of 'To Lookup' or 'From Lookup', and the Lookup group you wish to sync with.
For a Lookup group to appear in the group list:
- the current Toolkit user must be able to manage the Lookup group
- the “uis-toolkit-group-sync” Lookup group must have permissions set to “Managed by” on the target Lookup group (for syncing to/from) or “Privileged access by” if only syncing from Lookup.
Once configured, syncing will occur approximately once an hour. Changes to the group membership will be logged in the “Audit” section.
To create a distribution list:
- select the institution you wish to create a distribution list for using the chips in the top left of the screen. The Add button is disabled until only one institution is selected.
- select Add to open a drawer to the right of the page
- enter a ‘Display name’ field, add a ‘Primary address’ email and select a domain from the dropdown list. The dropdown list will contain the domains available to the selected institution.
- choose whether the distribution list will be hidden in the Global Address List. By default they will be visible.
- select ‘+’ in the permitted senders section and enter the CRSID, display name or email address to add permitted senders to the distribution list, if required. This will enable only 'Permitted Senders' to send email to the distribution list.
- select ‘–‘ to remove a permitted sender
- select Create group to create the distribution list.
Edit a selected group or distribution list
To edit a group or distribution list:
- select the group you wish to edit.
- select the Edit button to open a drawer.
- alter any aspect of the group and select ‘Apply changes’ to make the change
You can also amend a group membership by selecting the ‘Members’ tab at the top of the drawer. View group membership for more details.
Delete a group or distribution list
To delete a group or distribution list:
- select the group you wish to delete
- select delete to open a confirmation dialogue. Select ‘Delete’ to confirm or ‘Cancel’ to cancel the action. Once ‘Delete’ is confirmed, there is no undo function.
View group membership
To view group membership:
- double-select the group in the group table, or select ‘Edit’ if available.
- select the ‘Members’ tab to open the members list • add or remove group members using the buttons in the members table toolbar
- to export the members list select ‘Export to CSV’
Licensing group membership will be shown for each user and indicates whether group members have access to EES-provided services such as Teams, OneDrive and SharePoint, and whether they are licensed for Exchange Online and have a mailbox.
Please note users may appear to be licensed before the automated processes have assigned the relevant licenses – a delay of approximately three hours may be noticed in some cases.
Add new users to a group
To add a user to a group:
- select the group you wish to add a user to
- select add to open a dialogue in which users can be added
A ‘Select data source’ dropdown allows you to add users in several ways:
- ‘A list of users’ - Enter CRSID(s) into this field separated by commas or spaces. Email addresses can also be entered. Blue AD will be searched for an object with the email address and add it to the group. If none are found, a new “Contact object” will be automatically created.
- 'Members of another group' - the members of another group will be made members of the selected group.
- 'A group nested in this group' – a group will become a nested member of the selected group.
- 'A file of users' - the file will have one CRSID or email address per line.
Any combination of the above selections can be used.
- choose ‘select members’ to stage the new group members for addition. An expandable section containing a table confirming the users to be added will appear.
- select ‘Add members’ to confirm. A notification will appear to show which users have been successfully added and which ones couldn’t be (for example because they are already members).
Note: This option is not available if the group is synced from Lookup
Remove users from a group
To remove users from a group:
- use the checkboxes next to the group members to select which users to remove
- select the ‘remove’ button to confirm. A notification will appear showing which users have been successfully removed and which ones couldn’t be.
Note: This option is not available if the group is synced from Lookup
Export to CSV
In most places where a list of items is displayed (for example the group list or the membership list), you will find an ‘Export to CSV’ button to the right of the toolbar.
To export a group:
- select ‘Export to CSV’ to convert the visible entries in the list into a CSV file which can be downloaded or opened in a suitable application.
- select the arrow next to the button to open or save the file in an Excel format.