There are three pages where the room settings are stored:
- Details (includes room name, location, photos, department, room manager)
- Rules (includes private/public room, maximum capacity, available dates and times)
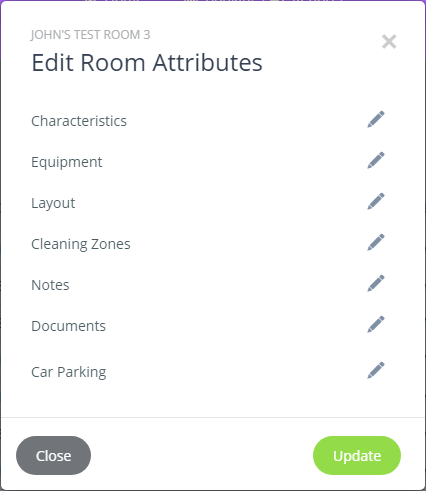
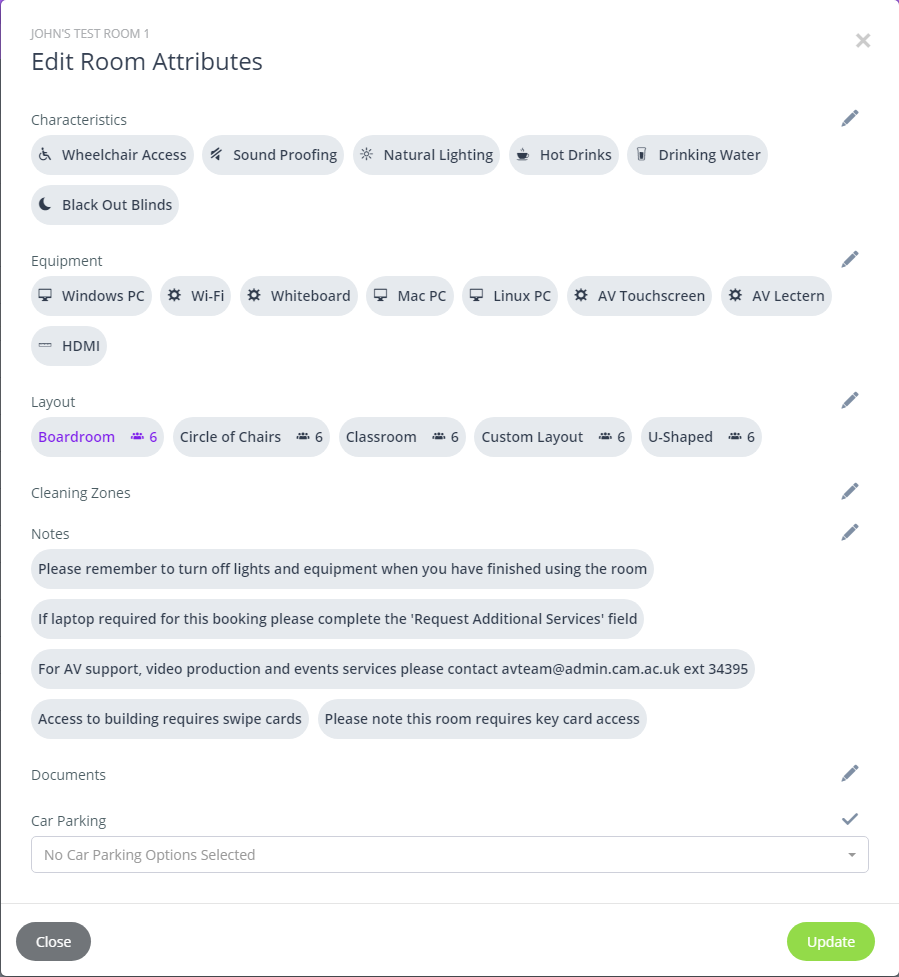
- Room Attributes (includes room layout, equipment, car parking)
Steps for adding a room
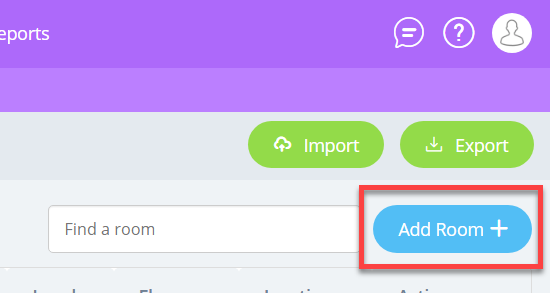
- First, add a new room. In the toolbar at the top, go to Data > Rooms.
- Over on the right, select Add Room to open the Create Room form.
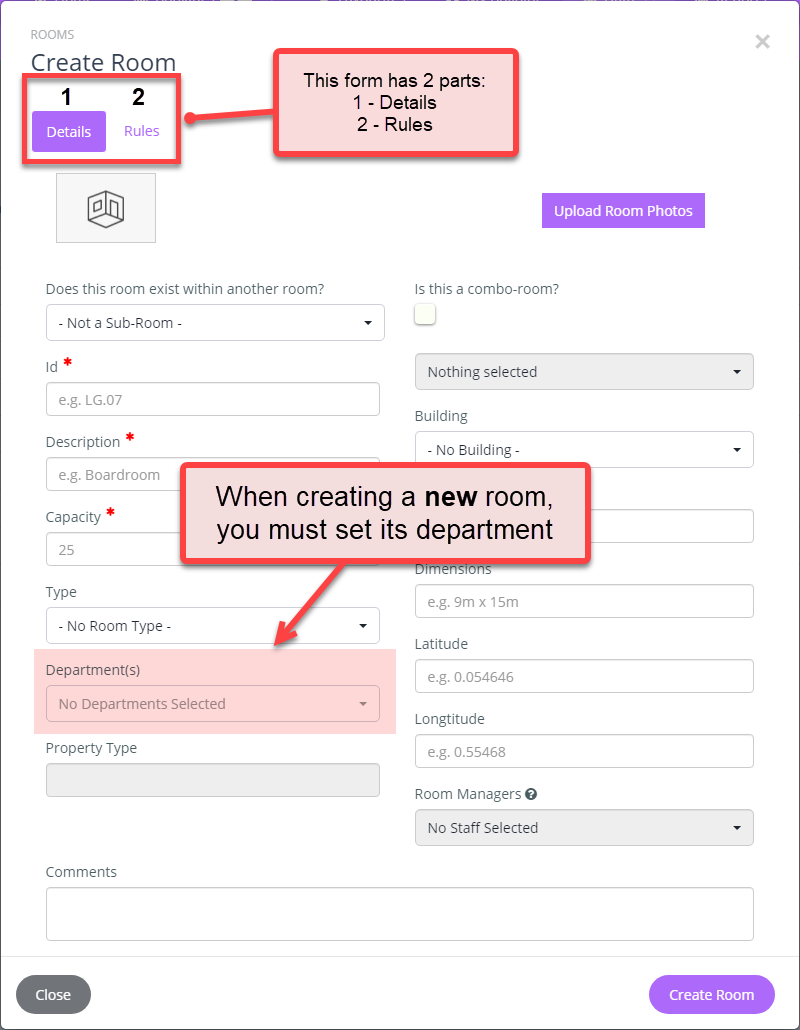
- This form has two parts: Details and Rules.
- Fill in the Details form, the fields are described below.
Remember to set the Department for the room, otherwise it will become invisible to you once you save the form.List of fields on Details page
Fields on Details page
Definition
Does this room exist with another room?
Defines whether this is a child room of either a parent Partitionable room or a Combo-room
ID
A unique identifier for the room
Description
The name of the room
Capacity
The default capacity of the room
Type
Defines the space/resource type
Department(s)
Enter the department(s) which the room belongs
Building
Select the building in which the room is located
Floor
Enter a short description of the floor e.g. “Ground”
Dimensions
Enter the room size
Latitude
Do not amend once the building is set
Longitude
Do not amend once the building is set
Room Manager
Assign a Room Manager(s) to the room
Comments
Enter free text as required.
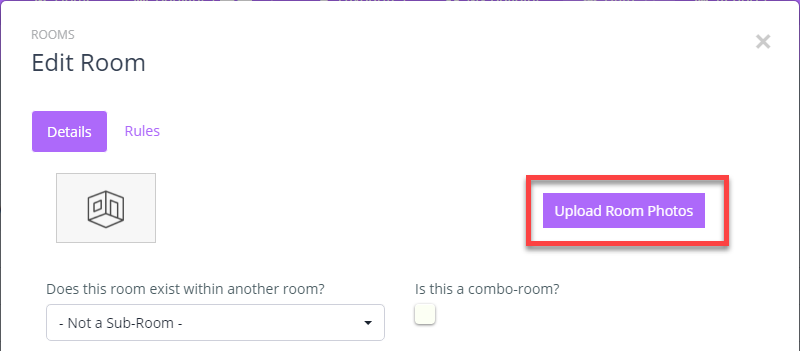
- If you want to upload photos of the room, select Upload Room Photos.
- At the top of the form select Rules and fill in the form, the fields are described below.
The most important field on this page is the Local tick-box.
This is how you decide if the room is bookable by anyone in the university, or just your department.
Tick Local to keep the room private to your department only.List of fields on Rules Page
Fields on Rules page
Definition
Set-Up & Take Down Time
Enter time in minutes for room set-up/take-down time before and after the room booking time.
Used in conjunction with Custodian role performing room lay-out changes.
Enable Recurring Bookings
Control to define whether recurring bookings are allowed in the room.
Recuring Limit
Define the maximum number of recurring bookings in a room booking series.
Note: The Enable Recurring Bookings flag needs to be set. By default, the recurring limit is unlimited
Advanced Booking limit
Controls how far into the future (in days) the room can be booked.
Release Time
Bookings for this room will become available at this time.
Open Space
Defines whether the space is open to be booked multiple times up to the maximum capacity of the room.
Requires Check-in
Used in conjunction with the Room Panel software and defines whether a user needs to “check-in” to the panel software at the start of a meeting.
Inactive Dates
Makes the room un-bookable between these dates.
Minimum Booking Notice
Controls the minimum notice (in days) must be given for the room before it can be booked.
Minimum Occupancy Threshold (%)
Controls the minimum number of attendees required to use the room.
Open Time
Do not amend once the building is set
Close Time
Do not amend once the building is set
Student Accommodation Charge Item
Not used by Booker.
Used in conjunction with the Accommodation product.
Event Accommodation Charge Item
Not used by Booker.
Used in conjunction with the Conference product.
Instantly Bookable
Controls whether user bookings are automatically approved. Note user needs to be assigned to the same department which owns the room.
Local
Controls whether the room/resource can be viewed and booked by anyone outside the department.
Allow Out of Hours Bookings
Controls whether this room/resource can be booked outside the building’s normal operational hours.
- Select Create Room to add the room to your list.
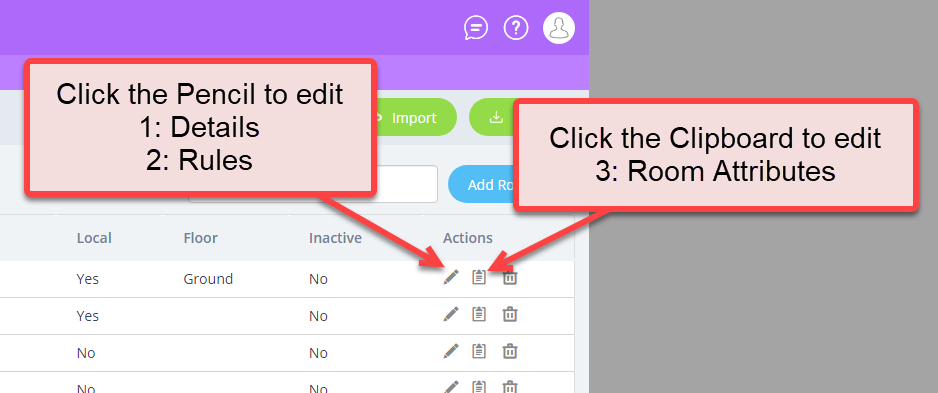
- Now that the room is in your list, you can set the room’s attributes. In your room list on the right, select the Clipboard icon.
- There are several attribute headings. To add attributes, select the pencil icon and make your choices.
- Select Update to finish.
Here’s an example of a room with some attributes filled in.