- Create a parent room for the hot desks to sit within.
- Go to Data > Rooms and select Add Room or Edit Room to open the Rooms form.
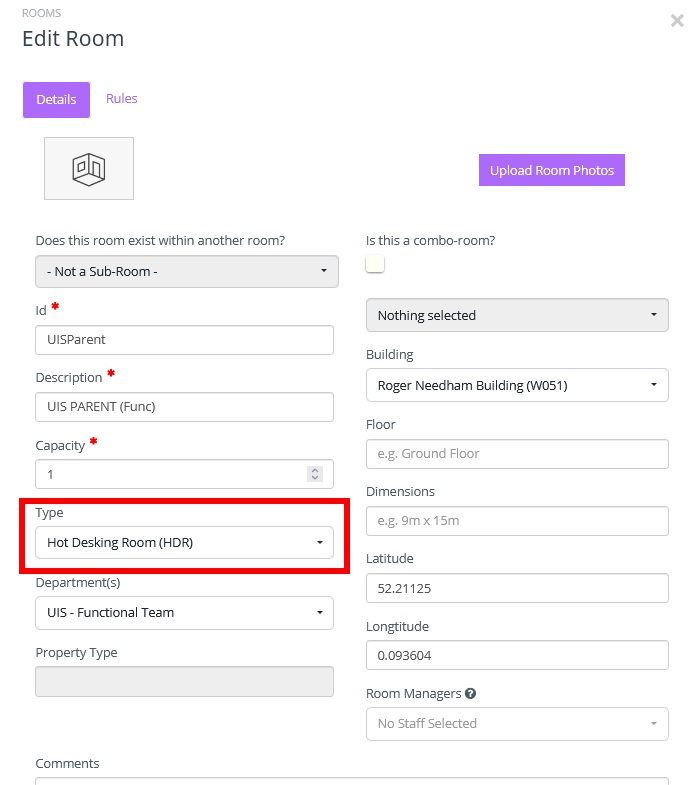
By default, the parent room cannot be booked on its own like a normal room, only its associated desks will be bookable as nodes on the floor plan. - Fill in the Details form. The fields are described below.
Remember to set the Department for the room, otherwise it will not be visible to you once you saved.
Details
Definition
Does this room exist with another room?
Defines whether this is a child or a parent room. Leave as Not a Sub-Room.
ID
A unique identifier for the room - use the Micad ID code. If unavailable a temporary 3 or 4 letter acronym, which can be extended for desk objects with a number system like 001 or 002, may be used.
Description
This is the room name users will see via the Desks search toggle.
Capacity
The default capacity of the room. Initially set to '1' until all the hot desks have been created. Team desks with more that 1 capacity can be set later.
Type
Defines the space/resource type. Set to Hot Desking Room (HDR).
Department(s)
Enter the department(s) which the room belongs. Any user associated to the department will be able to see this Hot Desking Room.
Building
Select the building in which the room is located.
Floor
Enter a short description of the floor e.g. “Ground”.
Dimensions
Enter the room size if known.
Latitude
Do not amend once the building is set.
Longitude
Do not amend once the building is set.
Room Manager
Assign a Room Manager(s) if required. Typically hot desks are Instantly Bookable and do not require approval.
Comments
Enter free text as required.
- Set booking rules in the Rules form.
Two key fields are;
Local tick-box.
This is how you decide if the room is bookable by anyone in the University, or just your department. Tick Local to keep the room private to your department only.Instantly Bookable tick-box.
Select this during set-up to ensure the parent room and hot desks can be booked instantly without approval from the Department or Room Manager. - Select Create Room or Update Room to confirm your settings.
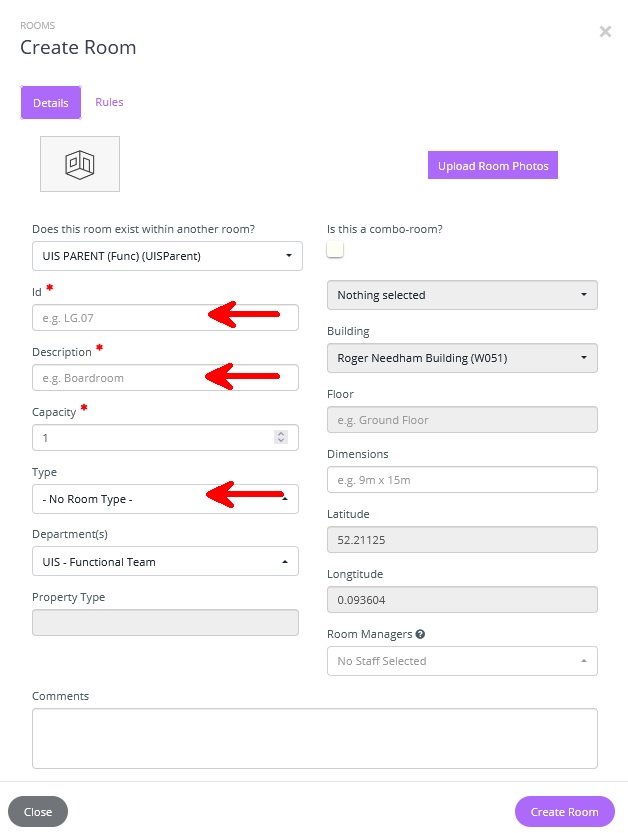
- Create the hot desks just like for the parent room, Go to Data > Rooms and select Add Room.
- Fill in the Details form. The fields are described below.
Details
Definition
Does this room exist with another room?
Defines whether this is a child or a parent room. Select the parent room created in Step 1. This will autopopulate some form fields.
ID
Desks will not have a Micad ID code. Create a 3 or 4 letter acronym followed by a numbering convention such as 001 for desk 1, 002 for desk 2 etc.
Description
The name of the hot desk. This will not be searchable via the Desks search toggle, only the parent name will be searchable.
Capacity
The hot desk capacity auto populates from the parent but can be amended for team desks.
Type
Defines the space/resource type. Set to Hot Desk (HD).
Other fields
Complete if required.
- Select Create Room to confirm your settings.
- Create an interactive Floor Plan. Go to Data > Floor Plans. Select the building your parent room falls under from the drop down list. Select the parent room from the second drop down list.
- Upload an image of the floor plan where prompted within the grey area (.png or .jpg file). Booker does not have a tool for creating floor plans.
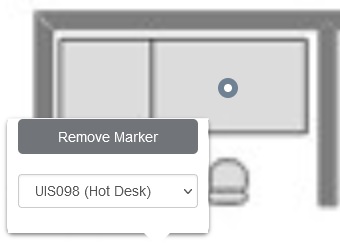
- Add nodes to desk spaces on the floor plan using the mouse cursor.
The view can be zoomed to make it easier to align the nodes.
- To remove a node, hover over it and select Remove Marker or use the drop down list to attach it to an available desk.
- Select Save Floor Plan once complete.
- Set hot desk attributes (characteristics, equipment and layout). Go to Data > Rooms. Select the pencil icon in the Actions column. These can be set for the parent room and host desks respectively.
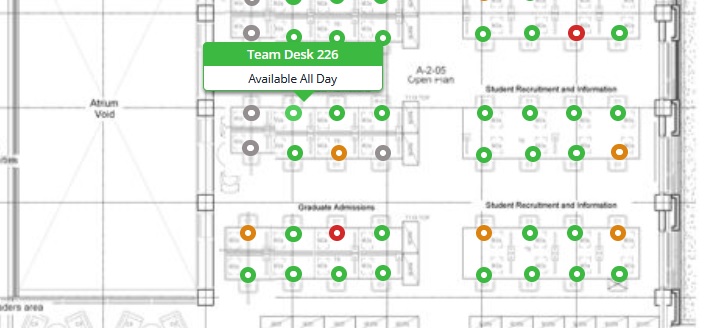
- The hot desks will appear under the Booker search bar's desk toggle.
- Users can now book hot desks from the interactive floor plan.
Hot desks can also be booked with recurring frequency, just like any standard room.